8085 & 8051 Simulators for Windows 8/7/XP and Linux
Almost all Engineering students might have Microprocessors & Microcontrollers laboratory classes in the course of 4 year degree. So, one must know how to write programs and feed it into 8085 & 8051 kits to get proper output. Unfortunately, most of us won't have access to those trainer kits when we want. Here, simulators come for the rescue.

Simulators are nothing but computer programs that are capable of doing the same thing as the real devices do. So, development kits are not at all needed for gearing-up for practical exams. One can execute assembly language programs on the PC itself.
What are all the benefits of using Simulators
- Syntax-highlighting - If the syntax you use is wrong, it will show it.
- Machine code - Equivalent machine code for your assembly language can easily be obtained.
- Testing - You can test the code before feeding it to Microprocessor or Microcontroller
Prerequisites for both 8085 & 8051 Simulators
To work with the simulators which I'm going to recommend you in this post, you need to install 'Java Runtime Environment' as the simulators are built using Java. Download and install JRE using the link given. JRE for Windows users
Debian, Ubuntu & Linux Mint users, run the following command on terminal to install JRM on your machine. Other Linux users use Google to find way to install JRE.
sudo apt-get install default-jre
8085 Simulator
First of all download the Java byte code of the simulator from the link - 8085 Simulator. Then, double click on the file downloaded. If you have a JRM installed machine, the simulator would have been opened. Now, you can start to work with your codes. Just follow some simple instructions given below.

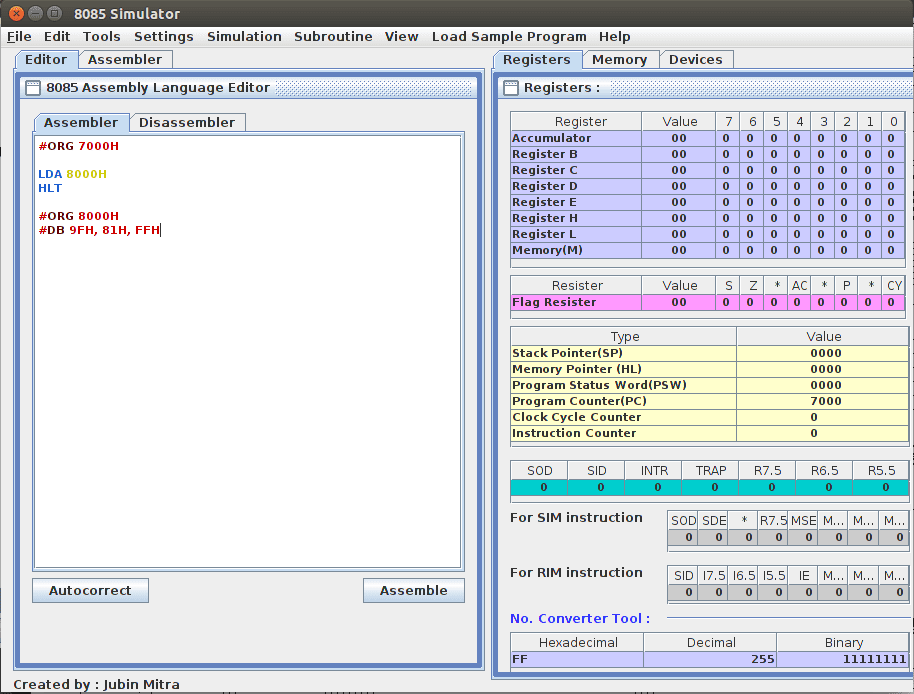
The above image is the user interface of the simulator. At the bottom of this 8085 simulator topic, I would have written how to execute a program. First learn something about the interface of the simulator. It consists of 5 tabs. They are,
Editor
In this tab, you will type the assembly language code you want to run.
Assembler
Assembler tab shows you the address in which the codes are stored, machine code of instructions, number of bytes of every instruction, and the number of T-states, M-cycles of every Mnemonic. Click on the T-states cell of any mnemonic to see the timing diagram of that particular instruction.
Registers
This tab contains the register details. That is, the hex value stored in each register & its binary representation. It also show the status of flag registers. At the bottom there is a number conversion tool. Just click on any tab, input value and press enter. It will be converted into other two formats.
Memory
It shows the data stored in memory locations. There are 3 options under the tabular column. Choose anyone of the option according to your needs.
I/O port editor
This tab displays the status of I/O ports.
Check the simple following example program.
#ORG 7000H

LDA 8000H
HLT

#ORG 8000H
#DB 9FH, 81H, FFH
These ORG, DB codes are used in this assembler for certain purposes. Take a look at the following table.
| Assembler directive | Example | Description |
|---|---|---|
| ORG (Origin) | #ORG 8000H | The next block of instruction should be stored in memory locations starting at 8000H |
| DB (Define Byte) | #DB FFH, BBH | Initializes an area byte by byte, in successive memory locations(Define Byte) until all values are stored. |
The instruction #ORG 7000H is used to store the mnemonics from the address 7000H. We all know that LDA instruction fetch the data from memory address to accumulator. So, the memory address 8000H must contain some data.
Hence to load data to memory location 8000H, the code #ORG 8000H & #DB 9FH is used. The prior instruction implies the following instructions must be stored from the address 8000H & the latter instruction is for storing data consequently from 8000H onwards. So, hex values are stored in memory locations in following manner in the given example.
8000H → 9FH
8001H → 81H
8002H → FFH
In this way, the required hex values are stored in the desired memory addresses.
Instruction to run programs on 8085 simulator
- After typing the assembly language instructions in the editor window, click on Assemble.
- Now, if there is no syntax error in the codes, it will switch to Assembler window.
- Here there are two options. Run all At a Time or Step By Step.
- Step By Step allows you to step through your program executing the program step by step where as the other option executes all the steps at a time.
- Don't forget to include
HLTat the end of your program. Else, it will take time to execute the program in Run all At a Time mode.
To know more about this simulator, download the developer's documentation of this simulator.
8051 Simulator
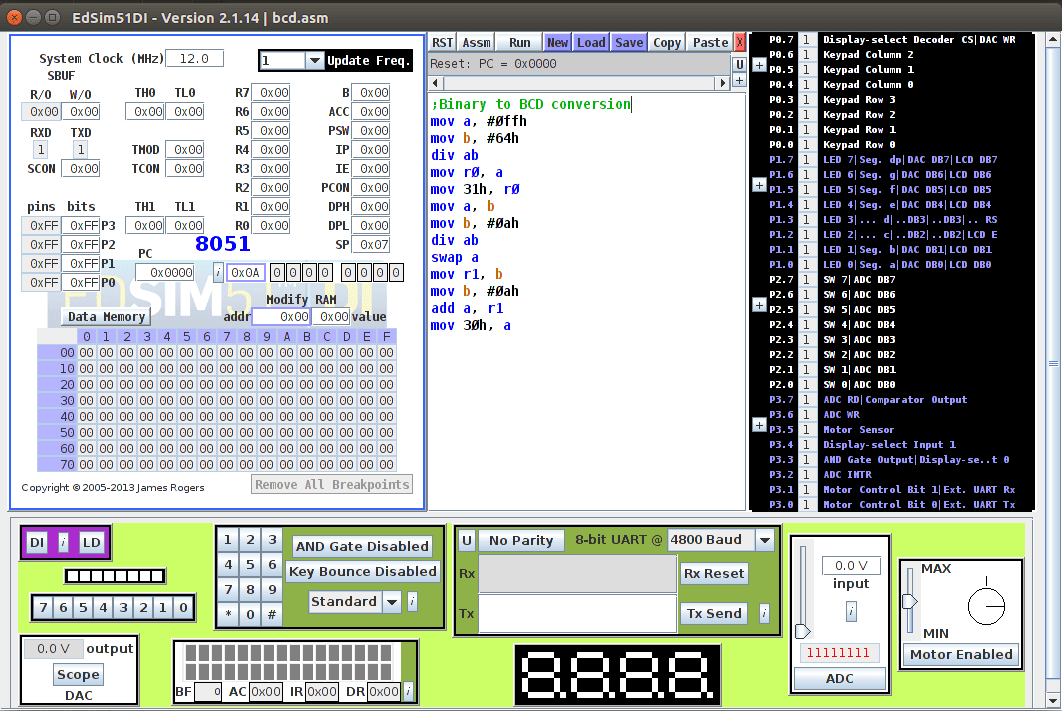
Unlike the 8085 simulator mentioned above, 8051 simulator is versatile and it comes with numerous peripheral devices like ADC, DAC, 7 Segment & LED displays, Matrix keyboard and Motor. Link - Download 8051 simulator
After downloading that .rar file from the link given, extract it. You would see a folder named, 'edsim51di'. Inside that folder, there would be a folder and a .jar file. Double click the .jar file to run the simulator. Keep the edsim51di folder as it is. Don't delete or move anything inside the folder.

Instrution to run programs on 8051 simulator
- Type the mnemonics in the white space provided.
- Click on 'Assm' to check whether the program has any error.
- If there is no error, either you can choose Step or Run to execute the program.
- Step executes the program line by line whereas Run executes the whole program.
- To stop the program execution, click on 'RST'.
Note: Represent hex values as #0FFH, #00EH. Otherwise, while assembling errors will be shown.
There are lot more things you can do with this 8051 simulator. To know more about it follow this link.
Many simulators are available online to simulate 8085 & 8051. But, I find this two more useful as it is compatible with all operating systems and more versatile than many other simulators on Internet.


Comments
Post a Comment